spacestr

🔔 This profile hasn't been claimed yet. If this is your Nostr profile, you can claim it.

Edit
KitchenNotes
Member since: 2026-10-15
KitchenNotes
KitchenNotes 1h

Creamy Chicken and Tortellini Skillet If you’re looking for a filling, comforting dinner that hits all the right marks without leaving you with a sink full of dishes, this Creamy Chicken and Tortellini Skillet is about to become your new weeknight obsession! Tender, seasoned chicken, plump cheese tortellini, sweet onions, and aromatic garlic come together in a velvety Parmesan cream sauce. Packed with lean protein and a healthy dose of spinach, it’s a complete, satisfying meal that goes from skillet to table in under 30 minutes. My husband even asked me to make an extra batch so he could bring some to his buddies at work! From the Freezer to Creamy Comfort Food The real beauty of this creamy chicken tortellini is its one-skillet convenience and how it delivers maximum flavor with hardly any effort (minimal cleanup? Count me in!). I season the chicken before coating it in a little flour, which helps thicken the broth and pan juices into a creamy sauce without making a separate roux. Even the frozen tortellini goes straight into the skillet without precooking. I add the cream when the broth is a little cooler to keep the sauce smooth, and I leave it slightly loose because the tortellini keeps soaking it up as it sits (which makes it even better for leftovers!). Frozen spinach is another budget-friendly shortcut I love here. It goes straight from the freezer into the skillet with no chopping, making this a restaurant-worthy dinner without the expensive ingredients or extra prep! Prefer a meat-free alternative? Just leave the chicken out of this dish and swap the chicken broth, or try our spinach tortellini skillet next. Recipe Success Tips Butter and olive oil are better together here! I use both because the olive oil helps coat the skillet for sautéing, while the butter adds a rich flavor that carries through into the creamy sauce. Keep the heat at medium, though, as butter can still burn when mixed with oil. Don’t cut the chicken too small! Aim for evenly sized, generous bite-sized pieces (check out my step-by-step photos below for reference). Chicken shrinks as it cooks, and tiny pieces can dry out quickly. Giving the chicken some room to make contact with the hot skillet also helps develop a little golden color and extra flavor. Just make sure the chicken reaches 165°F internally before serving. Keep the tortellini FROZEN until you’re ready to use it. No thawing or boiling beforehand! This recipe is designed for tortellini straight from the freezer, so thawing it first can throw off the cooking time and leave you with mushy pasta. Different brands may cook a little faster or slower, so check that the tortellini is tender all the way through before serving. A gentle simmer is your friend. Once the heavy cream and Parmesan go in, I keep the heat at medium-low. You only want small and gentle bubbles. Too much heat can reduce the sauce too quickly or cause the cheese to turn grainy instead of melting smoothly. Stir everything gently, too, so those little cheese-filled tortellini stay intact! Customize your skillet! I think adding peas or substituting them instead of spinach would be delicious. Asparagus or broccoli florets would also be delicious choices for substitutes or additions. Print Add to Collection Go to Collections Creamy Chicken and Tortellini Skillet This Creamy Chicken and Tortellini Skillet cooks everything together in a garlicky Parmesan sauce with spinach. No need to boil the pasta separately! Course Main Course Cuisine American Total Cost $13.94 recipe / $2.32 serving Prep Time 10 minutes minutes Cook Time 20 minutes minutes Total Time 30 minutes minutes Servings 6 servings (1.5 cups each) Calories 595kcal Author Jess Rice Equipment Large Sauté Pan Ingredients 1 lb. chicken breast I used just over that- 1.31lbs, $6.31* 1 small yellow onion diced, (5.79 oz) $0.42 3 garlic cloves minced, $0.18 ½ tsp salt $0.01 ½ tsp black pepper freshly cracked, $0.03 ½ tsp garlic powder $0.03 ½ tsp Italian seasoning $0.04 ¼ cup all-purpose flour $0.05 1 Tbsp olive oil $0.09 2 Tbsp salted butter $0.20 2 cups chicken broth $0.26** 19 oz. frozen cheese tortellini not thawed, $3.75*** ¾ cup heavy cream room temp, $1.11 1 cup frozen spinach $0.32 ½ cup Parmesan cheese $1.14 US Customary – Metric Instructions Gather ingredients. Dice chicken breast into bite-size pieces. They will shrink up a little as they cook. Mince onion and garlic. Set aside for now. Add salt, black pepper, garlic powder, and Italian seasoning to the diced chicken. Toss so every piece of chicken is seasoned. Then, add the flour to the seasoned chicken. Toss until fully coated on all sides. In a large sauté pan, add olive oil and salted butter over medium heat. Once the butter has melted, add the diced onion. Cook the onions until glossy and softened, about 4 minutes. Nudge the onions to the edge of the sauté pan and pour the chicken into the pan, giving each piece of chicken some surface contact with the hot pan. After 5 minutes, flip the chicken and sear on the opposite side, cooking for an additional 5 minutes. Add the minced garlic and deglaze the pan with the chicken broth, stirring the onions and the chicken together. Let that simmer on medium-low for 4 minutes. Add the entire package of frozen cheese tortellini to the simmering chicken and broth mixture. Stir the frozen tortellini until well-combined. Then, add the heavy cream. The frozen tortellini has lowered the temperature of the broth mixture which will lessen the chances of a curdled sauce. Stir everything together and add the shredded Parmesan and frozen spinach. Stir to combine and simmer over medium-low heat for 2 more minutes. The sauce will remain loose but will thicken slightly due to the starch from the cooked tortellini and the shredded cheese. I like the sauce to remain a little loose, because the tortellini will continue to soak up the sauce as it sits. (And I find it’s better for leftovers!) It should lightly coat the back of a spoon. Taste and adjust the salt and pepper to your liking. This is delicious hot, warm, or cold! See how we calculate recipe costs here. Notes *Boneless, skinless chicken thighs should work well here too. For food safety, check that the chicken reaches an internal temperature of 165°F (74°C), measuring the thickest pieces. **To keep costs low, we use Better Than Bouillon to make our broth. Making it from scratch will help you control the sodium in your recipe, but I recommend tasting the dish before adding additional salt, as bouillon does tend to be on the salty side. ***Keep your cheese tortellini frozen until the step where they hit the pan. If they are defrosted, they will likely overcook and become mushy. The amount of time required to cook them in this recipe from a frozen state results in perfectly cooked tortellini. Nutrition Serving: 1.5cups | Calories: 595kcal | Carbohydrates: 48g | Protein: 35g | Fat: 29g | Sodium: 1166mg | Fiber: 5g how to make Creamy Chicken and Tortellini Skillet step-by-step photos Gather and prep your fresh ingredients. Keep the frozen tortellini in the freezer until you’re ready to add it. Prep the chicken: Dice 1 lb. chicken breast into even, bite-sized pieces, keeping them slightly larger than you might think since they’ll shrink as they cook. Prep the aromatics: Now dice 1 small yellow onion and mince 3 cloves of garlic. Season and coat the chicken: Add ½ tsp salt, ½ tsp black pepper, ½ tsp garlic powder, and ½ tsp Italian seasoning to the diced chicken. Toss until every piece is evenly seasoned. Then sprinkle over ¼ cup all-purpose flour. Toss again until the chicken is coated on all sides with the flour. Sauté the onion: Heat 1 Tbsp olive oil and 2 Tbsp salted butter in a large sauté pan over medium heat. Once the butter has melted and begins to gently bubble, add the diced onion. Cook for about 4 minutes, stirring occasionally, until the onion looks glossy, softened, and slightly translucent. Sear the chicken: Push the onions to the edges of the pan, then add the flour-coated chicken, spreading the pieces out so they contact the hot surface. Cook for about 5 minutes, until the undersides are lightly golden, then flip and cook for another 5 minutes. Avoid moving the chicken around too much while it sears. Let it sit against the hot pan to develop color and flavor. Add the broth and garlic: Pour 2 cups chicken broth into the skillet along with the 3 cloves of minced garlic, stirring to combine everything with the chicken and onions. Gently scrape the bottom of the pan to release any flavorful browned bits. Reduce the heat to medium-low and let everything simmer gently for about 4 minutes. The broth should start to look slightly thickened as the flour coating incorporates into the liquid. Add the frozen tortellini: Pour the entire 19 oz. package of frozen cheese tortellini directly into the simmering chicken and broth mixture. There’s no need to thaw or precook it. Gently stir to distribute the tortellini throughout the skillet without breaking the delicate pasta. Make it creamy: Pour in ¾ cup room-temperature heavy cream and stir gently to combine. Adding the cream after the frozen tortellini helps because the pasta has slightly cooled the broth, reducing the chance of the sauce curdling. Keep the heat at medium-low so the sauce simmers gently rather than boiling vigorously. Add the cheese and spinach: Stir in ½ cup shredded Parmesan cheese and 1 cup frozen spinach. Continue simmering gently over medium-low heat for about 2 minutes, stirring occasionally, until the cheese has melted into the sauce and the spinach is heated through. The sauce should look smooth and creamy, with the spinach evenly distributed. Check that the tortellini is tender all the way through, simmering for longer if needed. Make sure the chicken has reached an internal temperature of 165°F. Check the sauce and serve: The sauce should remain slightly loose but still lightly coat the back of a spoon. Don’t worry if it looks a little thinner than a typical Alfredo sauce! The tortellini will continue absorbing the liquid as it sits, thickening the sauce naturally. Taste and adjust the salt and pepper to your liking. Serve and enjoy! What to Serve with Creamy Chicken Tortellini This recipe makes 6 generous servings of about 1½ cups each. It’s perfect for dinner tonight, with leftovers to look forward to at lunchtime tomorrow! I would pair this with a bright, fresh salad with a decent vinegary bite to cut through the richness of the oh-so-creamy sauce and cheesy tortellini. My go-to is our Greek salad, but this kale salad is another one of my absolute favorites! The subtle sweetness from the raisins and green apples really balances out this creamy chicken skillet. For something warm, our air fryer Brussels sprouts have deliciously crispy edges and are ready in about 20 minutes, so you can whip them up while the tortellini cooks. Or if you love a little bread with your saucy pasta, our no-knead focaccia rolls can be made ahead of time, making dinner even easier. Greek Salad$11.37 recipe / $1.42 serving Easy Kale Salad$5.90 recipe / $1.48 serving Air Fryer Brussels Sprouts$3.75 recipe / $0.93 serving No-Knead Focaccia Rolls$1.20 recipe / $0.10 serving Storage & Reheating Let any leftovers cool, then transfer them to an airtight container and refrigerate within two hours of cooking. They’ll keep for up to 3-4 days. The tortellini will soak up the creamy sauce as it sits (which is why I especially like the sauce to be looser when I know I’ll have leftovers!), so expect it to thicken in the fridge. Reheating Warm leftovers in a skillet over medium-low heat. You may need to add a splash of chicken broth or milk to loosen the sauce if the pasta has absorbed a lot. Stir gently until heated through to 165°F. You can also microwave individual portions in short intervals, stirring between each one for even heating. Freezing I wouldn’t recommend freezing this one. The cheese-filled tortellini can lose its tender texture, and the cream sauce may separate once thawed. You’ll get much better results keeping any leftovers in the fridge and enjoying them over the next few days. Love Tortellini? Try These Easy Recipes Next Our Cheese Tortellini and Sausage Skillet brings together savory Italian sausage, marinara sauce, spinach, and plenty of melty mozzarella for a hearty one-pan dinner. I love how our Creamy Spinach Tortellini Soup turns simple ingredients into a rich, creamy, veggie-packed bowl of comfort! For potlucks or make-ahead lunches, I’d go with this colorful Tortellini Salad tossed with fresh veggies and a zesty Italian dressing. Loaded with tender pasta, Italian sausage, and vegetables, our Sausage and Tortellini Soup is just the thing for a chilly evening! More Chicken Pasta Recipes Marry Me Chicken Pasta$8.44 recipe / $1.41 serving Chicken Pasta Primavera$13.66 recipe / $3.42 serving One Pot Creamy Cajun Chicken Pasta$9.41 recipe / $2.35 serving Chicken and Broccoli Skillet Lasagna$9.19 recipe / $1.53 serving The post Creamy Chicken and Tortellini Skillet appeared first on Budget Bytes. https://www.budgetbytes.com/creamy-chicken-and-tortellini-skillet/ #creamychicken #tortelliniskillet #creamycomfort #freezer #frozen #butter #comfortfood #even #rss #feeds #linksharing #qwibbit

#creamychicken #tortelliniskillet #creamycomfort #freezer #frozen
KitchenNotes
KitchenNotes 1d

The Holiday Tariff Trap: How to Host a Crowd Without Breaking the Bank Before the first kitchen timer goes off, international trade duties have already driven up the cost of your holiday dinner. Between a historic shortage in American cattle herds raising beef prices sky-high, tariffs on tinplate steel inflating the price of canned goods, and foreign trade duties hitting European cheeses, wines, and sweets, hosting a holiday meal in 2026 can feel like walking a tightrope. I’ve been seeing these price hikes firsthand while shopping, and it’s definitely made me rethink a few of my usual grocery picks. And while we can’t control international trade policies, we can outsmart them at the grocery store! Your Guide to a Budget-Friendly Holiday Feast Hosting family shouldn’t mean taking on a mountain of stress or spending your whole paycheck on dinner. With a few smart, budget-savvy pivots, I’m here to help you put together a celebratory feast that tastes incredible, looks festive, and sidesteps the latest markups on the shelves. Alongside my favorite budget-saving swaps and shopping tips, we’ve also put together a complete holiday menu that feeds eight people for around $45! TL;DR: The 4 Smartest Swaps for a Tariff-Proof Holiday Table Instead of buying the exact same grocery list you’ve used over the holidays for years, we found making these four simple adjustments will help keep your receipt total down: Ditch the canned goods: Tariffs on tinplate steel and imported aluminum have turned these former budget heroes into surprise budget busters. Buying canned pumpkin puree, canned green beans, canned yams, and canned cranberry sauce means you’re paying a hefty markup just for the packaging. Stick to fresh, bagged, or frozen U.S. produce instead. It’s cheaper, avoids the packaging surcharge, and often tastes noticeably better. Rethink the centerpiece protein: Avoid expensive beef roasts and foreign seafood this holiday season, both of which are carrying markups right now. Focus on domestic whole turkeys, bone-in turkey breasts, pork roasts, or glazed holiday hams. These proteins rely on local agricultural supply chains and are largely insulated from foreign trade taxes. We found whole turkey for as little as $0.85 per pound at Walmart, making it a fantastic budget-friendly centerpiece! Keep your dairy and drinks domestic: European cheeses like French Brie and Italian Parmigiano-Reggiano, along with wine and imported European butters, are carrying heavy import taxes. The U.S. produces both dairy and wine, so if you’re avoiding tariffs, they make a great swap. Switch to Wisconsin aged cheddar, Vermont goat cheese, domestic sweet cream butter, and West Coast wines. Focus on seasonal fruit, grain, and spice desserts: High tariffs have sent the price of specialty chocolates soaring, but we’re not giving up dessert! Lean into fruit-forward desserts like a pear galette or an apple crumble. You could also try an egg-rich chess pie, or any number of bread-based desserts. Other great options include sweet potato pie or pecan pie using pantry grains and domestic sweeteners. “Kicking the Can” at Thanksgiving A stress-free Thanksgiving dinner often relies on convenience canned products like jellied cranberry sauce, condensed cream-of-mushroom soup bases, and pumpkin puree. But in 2026, paying a premium for steel packaging is the quickest way to run up your total at the register. Aside from straight facts about how tinplate steel and aluminum tariffs are impacting our grocery carts this holiday season, let’s talk about yield, which applies to pre (and post–let’s hope!) tariff times, too. For example, if you want to give 8 people an honest half-cup portion of carrots, you cannot rely on the canned carrot’s label touting that 3.5 servings are ready to be enjoyed inside. You’d need at least 4 cans, yielding roughly 5 to 6 cups total; at $0.96 per can, that’s $3.84, and over a third of what you bought was salt water and packaging. On the flip side, a 4 lb. bag of raw carrots yields a solid 14 to 16 generous side servings. Even after peeling and trimming the tips (about a 10% prep loss), you are left with roughly 57 to 58 oz of pure edible veg. At $4.77 for the 4 lb bag, you feed twice as many guests for roughly 40% less out of pocket than buying the 6 to 7 cans needed to match that yield, paying around 8.3 cents per edible ounce compared to over 13 cents for canned solids, while skipping the canned brine (and tinplate steel and aluminum tariffs) completely! Here is how to ditch the cans and build a fresher table for less money with just a little bit of extra elbow grease: Make a 15-Minute Fresh Cranberry Sauce with 3 Ingredients A can of jellied cranberry sauce seems cheap until you compare its price per ounce to a simple bag of fresh, American-grown cranberries. Simmering whole cranberries on the stove with a little sugar, a splash of water, and fresh orange zest takes less than twenty minutes. It thickens naturally as it cools, costs less, and delivers a vibrant flavor that makes the canned jelly completely obsolete. Our easy three-ingredient cranberry sauce recipe (shown above) has become my go-to. Only need a small batch of cranberry sauce? Put the rest of those fresh cranberries to good use and make my sugared cranberries. They’re a delicious, festive, budget-friendly treat that doubles as a gorgeous garnish for your turkey platter and holiday desserts. A little update from the grocery aisle! When we photographed our holiday menu on 10/22/26 for this blog post, Great Value fresh cranberries weren’t available at Walmart yet, so we picked up a 12 oz. bag from Kroger instead. But when we checked Walmart again on 10/26/26, they were finally in stock for just $0.76 a bag! That’s cheaper than a can of cranberry sauce AND a whopping $2.23 less than we paid at Kroger for the same size bag. Proof that a little comparison shopping can make a big difference to your holiday grocery bill. This photo was taken on 10/26/26 at our local Walmart in Nashville, TN. Swap Out the Green Bean Casserole Traditional green bean casserole often relies on canned french-cut green beans and canned cream soups…a double hit of packaging markups! Instead, grab two pounds of fresh green beans from the produce section or a couple bags of frozen from the freezer section. Sauté them in a skillet with a drizzle of olive oil or domestic butter, garlic, and a pinch of other ingredients you probably already have on hand. It’s crisp, colorful, and feels like something you’d order at a nice restaurant. Elevate the Bread Basket Instead of spending $8 to $12 on a small wedge of imported cheese to snack on before dinner, make the bread basket your showstopper instead. Bake a quick batch of warm homemade dinner rolls or a skillet of golden cornbread, and serve it alongside whipped domestic sweet cream butter drizzled with local honey and sea salt. They cost pennies per serving, actually fill people up, and feel deeply comforting. Short on time? Don’t feel bad about grabbing a bag of ready-made dinner rolls at the grocery store like we did this time. At only $1.52 for 12 dinner rolls, I have no regrets…just extra time to spend with my family! Prep Ahead to Keep Your Sanity Prepped carrots, celery, and potatoes in deli containers with cold water. Admittedly, scratch-cooking fresh foods takes more prep than opening a row of cans with a can opener, but that doesn’t mean you need to be glued to the stove all day. Make your cranberry sauce two days in advance. Peel and chop your carrots, celery, and potatoes the day before and keep them refrigerated in water. Then on the holiday morning, you’re just assembling, roasting, and mashing, not stressing! Christmas & Holiday Entertaining: Luxury Without the Luxury Tax Christmas dinner and New Year’s Eve often lean toward luxury imports like Champagne, ornate cheese boards, and expensive cuts of beef and roasts. You can still create an indulgent spread without absorbing tariffs: 1. Build an American Charcuterie Board Spot the savings! The imported Swiss Gruyère on the right costs $7.97 for 6 oz., while the Wisconsin-made Gruyère right next to it is just $4.87 for 7 oz. That’s $3.10 less for an EXTRA ounce! The days of carefree grazing boards might be behind us (for now…fingers crossed!), but you don’t need imported French cheeses or Italian prosciutto to put together an impressive board. The U.S. produces excellent artisanal cheeses! While we navigate this timeline with import taxes kicking us while we’re down, try a sharp, aged Wisconsin white cheddar, a log of creamy Vermont goat cheese, or an Oregon blue cheese instead. Pair your American-made cheeses with domestic cured salami, crisp sliced apples, local honey, and candied Georgia pecans. It looks gorgeous, takes no time at all, supports local dairies, and dodges hefty markups. 2. Pour West Coast Bubbles or Switch to a Festive Mocktail If your holiday tradition calls for a celebratory toast, you might need to leave the French Champagne and Italian Prosecco behind. Luckily, California, Oregon, and Washington state produce exceptional sparkling wines at a fraction of the cost of imported bottles, giving you festive bubbles without paying international shipping and tariff penalties! If alcohol isn’t in your budget, period, swap it out and save yourself a bunch of money by making a festive mocktail instead! 3. The Real Math: Why We Retired Our Holiday Pot Roast At Budget Bytes, we don’t typically build holiday recipes around $70 rib roasts, but a cozy beef chuck roast used to be one of our favorite reasonably-priced celebratory centerpieces. Historically, our absolute max to keep a recipe accessible on the site is staying under $3.50 per serving. So, when we ran the numbers on our classic pot roast between 2024 and 2026 at Walmart, the math was eye-opening: 2024 Beef Pot Roast (8 Servings): A 2.61 lb chuck roast ran $17.33. Combined with basic vegetables, bouillon, and seasonings, the whole pot cost $25.86, or $3.23 per serving. 2026 Beef Pot Roast (8 Servings): That exact same 2.61 lb cut of chuck roast at the same store jumped to $25.02—a 44% increase on the beef alone. Factoring in slight cost increases on the rest of the ingredients, the meal totaled $33.95, or $4.24 per serving. A 44% jump pushes an everyday pot roast right out of budget territory. Save our pot roast recipe for later, but we’re pivoting for the holidays this year. It’s All About the Bird! Domestic turkeys are waiting for you at the grocery store right now at drool-worthy prices because they are raised, processed, and distributed entirely within the United States. While beef prices climbed, we found a whole turkey that easily feeds 7 to 9 people for just $13.11. (I also found another 11.72-pound turkey a few days later for $9.84! Today, I found a frozen whole turkey, 13.55 lbs, for $11.52! That’s a pretty good deal at 85 cents per pound.) If you’re hosting a smaller gathering, a 5.5 lb bone-in turkey breast came out to $16.33. But from a budget perspective, the whole bird is easily the better value, giving you more than double the meat at a fraction of the price per pound. If your oven can’t fit a giant bird, you can always spatchcock your turkey to lay it flat, opt for an even cheaper roasted chicken, or go for the turkey breast-only option. Otherwise, go for the full bird and enjoy the leftovers if you have the oven space! (And if you ARE tackling a whole turkey this year, keep an eye out for our ultimate guide to the best Thanksgiving turkey, which is coming soon! It’ll have everything you need to know to get it just right.) Pro Tip: Roasting a whole bird or a bone-in breast alongside cheap root vegetables like carrots, onions, and potatoes allows the vegetables to caramelize in the flavorful pan drippings, creating your main dish and side dishes all in one pan. After dinner, simmer the roasted bones with water and vegetable scraps to make rich broth, then turn the leftovers into a comforting turkey noodle soup (recipe also coming soon!) or a creamy turkey pot pie later in the week. The Complete ~$45 Holiday Feast Here is a full, holiday dinner menu built around fresh, American-grown staples and domestic supply chains. It comfortably feeds a family gathering of 8 for $45.72 total (calculated with Tennessee’s 4% grocery tax): The Menu: Roast whole turkey with herb butter (you could even brine it, too!) Classic fluffy mashed potatoes (3 lbs) Savory vegetable stuffing Fresh sautéed garlic green beans (Double batch) Easy roasted carrots (Double batch) 3-ingredient cranberry sauce Classic turkey gravy Store-bought bakery pumpkin or fruit pie Soft warm dinner rolls The Grocery Cart Breakdown: Whole domestic turkey: $11.52 Russet potatoes (3 lb bag): $2.47 Sweet cream butter (1 lb): $3.06 Whole milk (64 oz): $2.32 Fresh celery (1 bunch): $2.04 Fresh French loaf/bakery bread: $1.47 Yellow onion (1 large): $0.97 Fresh garlic (1 bulb): $0.72 Fresh green beans (2 lbs): $3.63 Fresh whole carrots (4 lbs): $4.77 Fresh cranberries (12 oz bag): $2.99* Fresh navel orange (1): $0.98 Bakery pre-made pie: $4.94 Pre-made dinner rolls: $1.00 Total: $42.88 Note: *When we photographed our menu on 10/22/26, Great Value brand fresh cranberries were not available at Walmart yet, so we picked up a bag from Kroger, which was significantly more expensive. I manually added the cranberries from the 2nd grocery stop (and the 4% sales tax) to our total. But now that fresh cranberries are available at Walmart for just $0.76 a bag (as I saw on 10/26/26), you should be able to bring your total down even more by buying them there instead! Pantry Staples Used: Salt, black pepper, flour, granulated sugar, vegetable broth, and dried baking spices (dried thyme, rosemary, sage, and parsley). Why This Strategy Works This menu works because it centers on staple proteins and produce, featuring domestically raised turkey alongside hearty crops like potatoes, carrots, onions, garlic, and cranberries. The U.S. produces massive quantities of these staples locally, so their prices aren’t tied to shipping containers, port disputes, or trade friction. The rising cost of gas and diesel does affect domestic products (and our plans to travel for the holidays!), but we’re doing the best we can. By buying raw or frozen, domestically grown produce and relying on basic American dairy and pantry seasonings, you avoid the packaging tariffs hitting canned goods and the trade surcharges driving up imported meats and luxury items. You don’t have to sacrifice flavor, tradition, or hospitality to survive this season’s grocery landscape; you just have to shop with a plan. To our friends outside the U.S.A.: While this breakdown is tailored to U.S. supply chains, the exact same principle applies where you are. Leaning into your domestically grown root crops, greenhouse produce, and domestic staples is your best defense against punishing import markups and currency exchange rates. Sources: USDA Economic Research Service (ERS) – Cattle & Beef Market Outlook (Beef inventory and market pricing trends) Consumer Brands Association (CBA) – Tinplate Steel Tariffs Impact Report (Canned food and metal packaging duties) Office of the United States Trade Representative (USTR) – Enforcement & Tariff Actions (Import duties on European cheeses, wine, and confections) USDA Economic Research Service (ERS) – Turkey Sector Background & Statistics (Domestic poultry production and supply chains) USDA Foreign Agricultural Service (FAS) – Dairy Tariff-Rate Quotas (Import regulations on foreign butter and specialty dairy) More Budget-Saving Resources The Almost Tariff-Proof Grocery Guide: How to Eat Well When Supply Chains Shift Smart Grocery Shopping Tips When You’re Already Pinching Pennies 10 Foods I Freeze to Save Money and Reduce Waste The post The Holiday Tariff Trap: How to Host a Crowd Without Breaking the Bank appeared first on Budget Bytes. https://www.budgetbytes.com/tariff-holiday-guide/ #holiday #european #feast #feasthosting #swaps #instead #rss #feeds #linksharing #qwibbit

#holiday #european #feast #feasthosting #swaps
KitchenNotes
KitchenNotes 1d

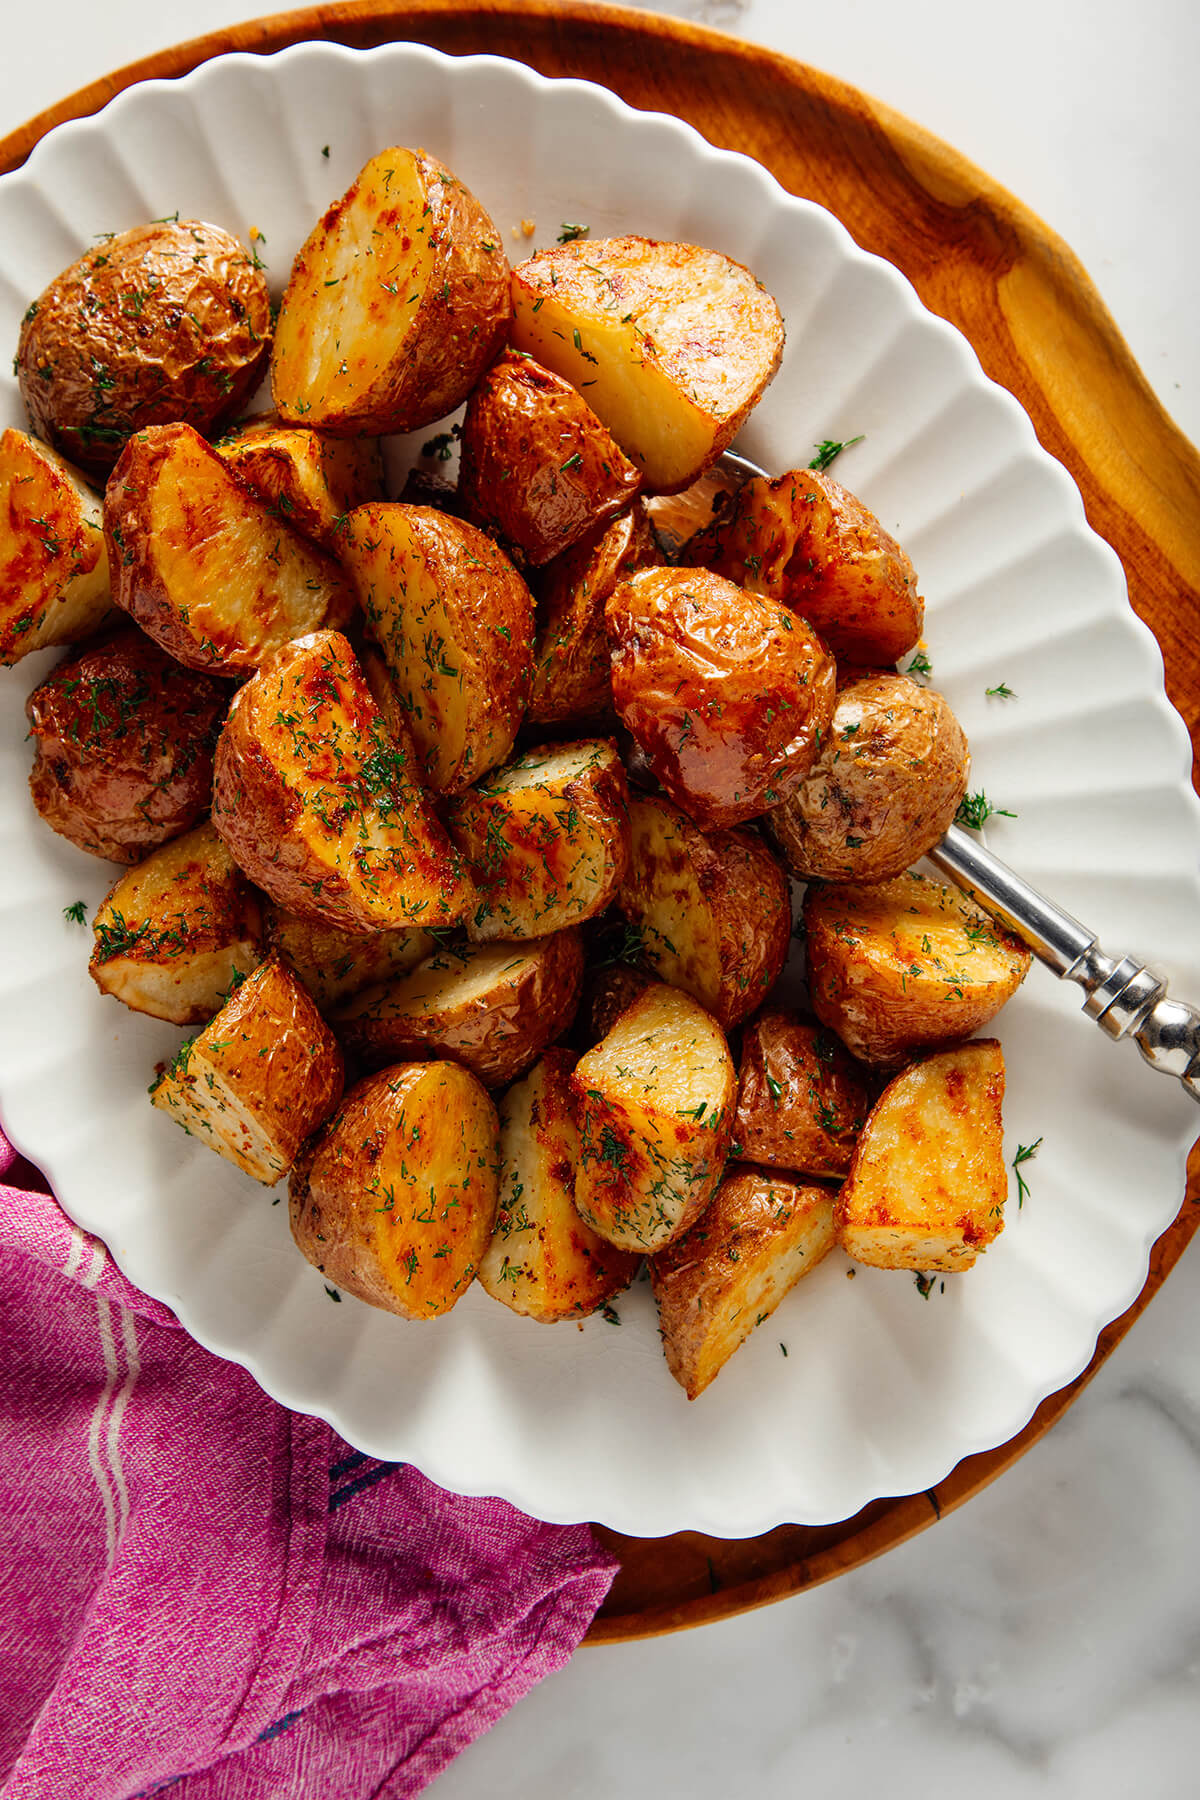
Perfect Roasted Red Potatoes I honestly crave these roasted red potatoes. They’re golden on the outside and fluffy on the inside, with the characteristically earthy flavor you’d expect from red potatoes. My mom often served red potatoes as a side dish when I was growing up, and this roasted version tastes extra special. After some trial and error in the kitchen, I’m sharing all the tricks for roasting perfect red potatoes! Here’s a rundown: Use parchment paper to prevent the potatoes from sticking to the pan. Cut the potatoes into rather large two-inch chunks so you can enjoy the contrast between the creamy interiors and crisp exteriors. Toss the potatoes with olive oil and garlic powder for irresistible seasoning. Fresh garlic burns, so powder is a better choice. For proper browning, use relatively high heat and roast starting with the flat sides down. Continue to the recipe... The post Perfect Roasted Red Potatoes appeared first on Cookie and Kate. https://cookieandkate.com/roasted-red-potatoes/?adt_ei=*|EMAIL|* #redpotatoes #roastedred #use #rss #feeds #linksharing #qwibbit
#redpotatoes #roastedred #use #rss #feeds
KitchenNotes
KitchenNotes 2d

Ham and Bean Soup It’s officially soup season, and I’m SO ready for it! This easy Ham and Bean Soup is loaded with tender canned white beans, colorful veggies, and savory chunks of browned ham, all in a thick, creamy broth (made without any actual cream or dairy). It’s a great way to use up leftover holiday ham, but I certainly don’t wait for a holiday to make it! I use just 8 basic ingredients plus a few seasonings to make this hearty, easy, budget-friendly soup, and it’s ready in less than an hour! “This is excellent. I added leftover chopped up asparagus and four cups of the chicken broth. If ham is not an option smoked kielbasa is great too. I topped the soup with mozzarella an smoked parmigiana cheese.” Julie W How I Build Big Flavor in Less Time Traditional ham and bean soups often start with dried beans and a ham bone that simmer together for hours. And there’s definitely a time and place for that! But I wanted an easy version that didn’t require soaking beans or spending all afternoon waiting for dinner. So I use canned cannellini beans and fully cooked ham to get a head start. They’re already cooked, which means I can spend my time building flavor instead. One thing I do differently is brown the ham before adding anything else. This gives the edges a little color and leaves behind tasty browned bits on the bottom of the pot (called fond). When I add the onion, carrots, celery, and garlic, their natural moisture loosens those bits and brings that extra flavor into the soup. Sautéing the vegetables also softens them and brings out a little natural sweetness. For the broth, I borrowed a trick from my white bean soup and purée one can of beans with its liquid. This thickens the soup and adds a lovely creaminess without flour, cornstarch, or heavy cream. I leave the other two cans whole for a chunky texture, and after the initial flavor-building stages, everything comes together with just 15 minutes of simmering! Recipe Success Tips Give the ham a chance to brown. I cook the diced ham in oil over medium heat for 3-5 minutes, until the edges are lightly browned and golden-brown bits form on the bottom of the pot. This builds the salty ham flavor you’d normally get from simmering a ham bone for hours, just in much less time! If those bits start turning very dark, lower the heat so they don’t burn. Blend one can of beans, liquid and all! Purée ONE can of cannellini beans with its canning liquid, then drain the other two. The smooth beans thicken the broth, and the whole beans give the soup its chunky texture. No blender? You can thoroughly mash that first can with a potato masher or fork instead. It won’t be as smooth, but this is a chunky soup anyway! Let the soup boil and thicken. The 15-minute boil allows some of the broth to evaporate while the puréed beans thicken the soup. I give the pot a good stir every few minutes, making sure to scrape along the bottom, to keep the beans from sticking. If it gets thicker than you’d like, stir in a little more broth or water until you reach your preferred consistency. Taste before adding salt. Cooked ham is pretty salty, especially when it’s cured, and chicken broth adds even more seasoning. That’s why I wait until the ham goes back into the pot before tasting and adjusting. I didn’t need any extra salt in my batch, but I finished each bowl with a little extra black pepper. What Kind of Ham Can I Use? For this quick ham and bean soup, I recommend fully cooked ham (or leftover cooked ham from another meal) rather than a ham hock. We’re using canned beans and other ingredients that cook quickly, so there’s no need to spend hours simmering a ham bone to flavor the broth! Thicker pieces work best because they hold their shape and develop nicely browned edges when sautéed. Boneless vs. Bone-In Ham Steaks Both of these ham steaks are fully cooked and work well in this recipe: Boneless ham steak: My easiest choice! There’s no bone to work around, and the thick slices are easy to cut into bite-sized pieces. You can buy ham steaks in smaller packs (shown above) or use a package of fully cooked, boneless, sliced ham (as I did in the recipe below). Bone-in ham steak: This works just as well once you’ve removed the bone and any tough rind. Just remember that you need 1 lb. of usable ham, so you’ll need to buy a little extra to account for the weight of the bone. What About Other Types of Ham? I saw a LOT of ham options at the store when shopping for this recipe, and you probably will too, especially around the holidays. The fully cooked, boneless spiral-cut ham and smoked shank portion ham shown above can both work, BUT I’d save those bigger hams for a holiday centerpiece (like our baked ham) and use the leftovers for this soup. I wouldn’t splurge on a big ham for this recipe unless you plan to use it for several meals. Ham slices are cheaper, easier, and all you need for this quickie soup. Ham hocks are a different story! They’re better suited to traditional bean soups that simmer for hours. The long simmer gives the connective tissue time to soften and the smoky flavor time to develop. The pork hocks pictured above are only partially cooked, so they aren’t suitable for this shortcut recipe as written. If you’d prefer to make soup using a ham hock and dried beans, check out our navy bean soup recipe instead. It uses a smoked ham hock and takes over two hours of cooking, plus soaking time for the beans. Print Add to Collection Go to Collections Ham and Bean Soup This incredibly easy and deliciously chunky Ham and Bean Soup features a medley of colorful vegetables, browned ham, and plenty of hearty white beans. Course Dinner, Lunch, Main Course, Soup Cuisine American Total Cost $11.47 recipe / $2.87 serving Prep Time 15 minutes minutes Cook Time 40 minutes minutes Total Time 55 minutes minutes Servings 4 servings (1.5 cups each) Calories 385kcal Author Beth Moncel Equipment Small Blender Dutch Oven Ingredients 1 yellow onion medium dice, (2 cups) $0.95 3 carrots medium dice, (2 cups) $0.75 3 ribs celery medium dice, (2 cups) $0.61 2 garlic cloves minced, (1 Tbsp) $0.12 1 lb. cooked ham medium dice, $5.92* 1 Tbsp cooking oil $0.04 3 15.5 oz. cans cannellini beans $2.76** ¼ tsp dried thyme $0.02 ¼ tsp black pepper freshly cracked, $0.04 2 cups chicken broth or more as needed, $0.26*** US Customary – Metric Instructions Gather and prepare all ingredients. Dice the onion, peel and slice the carrots, slice the celery, and mince the garlic. Dice the ham into bite-sized chunks. Add the ham and cooking oil to a large soup pot. Sauté the ham for 3-5 minutes over medium heat, or until it achieves a decent amount of browning. Remove the browned ham to a clean bowl. Add the onion, carrots, celery, and garlic to the pot in place of the ham. Sauté the vegetables for about 5 minutes over medium heat, or until the onions have softened. Allow the moisture released from the vegetables to help dissolve the browned bits of ham from the bottom of the soup pot as you stir. While the vegetables are sautéing, add one of the three cans of beans to a blender, with the liquid from the can, and purée until smooth. Drain the remaining two cans of beans. Add all three cans of beans (one puréed and two drained) to the soup pot with the vegetables. Also add ¼ tsp dried thyme, ¼ tsp pepper, and stir to combine. Next, stir in 2 cups chicken broth. Then turn the heat up to medium-high and allow the soup to come to a boil. Once it reaches a boil, turn the heat down to medium and allow the soup to continue to boil for 15 minutes, stirring occasionally. As the soup boils, it will reduce and thicken. If the soup becomes too thick, add more chicken broth or water to achieve your desired soup consistency. After the soup has boiled for 15 minutes and has thickened, stir the cooked ham back into the soup. Give the soup a taste and adjust the salt or pepper to your liking. I did not add any additional salt, but I did top each bowl with a little fresh pepper. Serve hot! See how we calculate recipe costs here. Notes *Thicker slices work best for this soup, so ham steaks, leftover holiday ham or honey glazed ham are all good options. I used honey-smoked, fully cooked ham that I diced myself. Make sure you’re using fully cooked ham for this quick-cooking recipe. A raw ham hock or uncooked ham bone needs a different cooking method. **Canned cannellini beans are great here because they’re large, soft, creamy, and already cooked. Other white beans, like canned Great Northern or navy beans, work too. This recipe uses three 15.5 oz. cans, one puréed with its liquid and two drained and kept whole. ***I use Better Than Bouillon to make my broth because it’s economical and easy to keep on hand. The saltiness of your broth will vary by brand, so hold off on adding extra salt until the soup is finished. You can also add more broth or water if you prefer a thinner soup. Seasonings: I kept the seasonings simple on purpose, choosing thyme and black pepper to complement the savory ham without needing a long simmer to develop flavor. Feel free to adjust the seasonings to your taste, but I’d skip anything that benefits from a longer cooking time, like bay leaves. This soup only simmers for 15 minutes! Can I use dry beans? I developed this recipe specifically for canned beans because they’re already cooked and make this soup so much faster! Dried beans take much longer to cook and require different amounts of liquid and seasoning. I haven’t tested this stovetop recipe with dried beans, but if you don’t have canned beans, here are two options to try: -Cook the dried beans first: Soak the beans overnight, discard the soaking water, then boil vigorously in fresh water for at least 10-15 minutes and continue cooking until soft and the consistency of canned beans (this can take several hours). You’ll need about 4½ cups of cooked beans to replace the three cans. Purée 1½ cups with about ½ cup of water, then add the remaining 3 cups whole. This option means you can follow the recipe as written, only adjusting the broth as needed. -Start with dried beans: I recommend following our navy bean soup instead. It uses soaked dried navy beans, ham hock, and simmers on the stovetop for about 2 hours. My old slow cooker ham and bean soup also uses soaked dried beans and ham hock (download that recipe here!). Or for a recipe that doesn’t need presoaked beans, try my slow cooker white bean soup, adding browned, fully cooked ham at the end. Nutrition Serving: 1.5cups | Calories: 385kcal | Carbohydrates: 39g | Protein: 34g | Fat: 13g | Sodium: 2226mg | Fiber: 12g How to Make Ham and Bean Soup Step-by-Step Photos Gather all of your ingredients: This is the type of ham I used (honey cured boneless ham). You can use any cooked ham, but a thicker slice works better than thin sandwich slices. You can also use cooked holiday ham. You’ll need 1 lb. of cooked ham. Prep the veggies: Dice 1 yellow onion, peel and slice 3 carrots, slice 3 celery ribs, and mince 2 cloves of garlic. I recommend keeping the vegetables fairly uniform in size so they soften evenly during the short cooking time. Brown the ham: Start by dicing 1 lb. of fully cooked ham into bite-sized pieces. Add the ham and 1 Tbsp cooking oil to a large soup pot or Dutch oven. Sauté over medium heat for 3-5 minutes, stirring occasionally, until the edges turn golden brown. You should also see some browned bits developing on the bottom of the pot. Keep an eye on the heat so they don’t burn. Remove the ham to a clean bowl and leave those browned bits behind. Sauté the vegetables: Add the prepared onion, carrots, celery, and garlic to the same pot. Sauté over medium heat for about 5 minutes, stirring occasionally, until the onions look translucent and the vegetables begin to soften. They’ll release some moisture as they cook, so use your spoon to gently scrape up the browned bits left by the ham. Purée one can of beans: As the vegetables cook, add one 15.5 oz. can of cannellini beans to a blender, including all the liquid from the can. Blend until smooth and creamy. This mixture will help thicken the soup without adding cream! Drain the other two cans: Now drain the remaining two cans of beans, but don’t purée them. We want those beans to stay whole for texture. This is what the veggies should look like after sautéing for about 5 minutes. The bottom of the pot should also look noticeably cleaner as those bits dissolve into the vegetables. Add the beans and seasonings: Add the puréed beans and both cans of drained beans to the pot with the softened vegetables. Sprinkle in ¼ tsp dried thyme and ¼ tsp freshly cracked black pepper. Stir gently until the creamy bean mixture coats the vegetables and whole beans. Try not to mash the whole beans as you stir. Pour in the broth: Add 2 cups chicken broth and stir until everything is combined. The soup will look fairly watery at this point, but that’s normal! The puréed beans will give the broth more body as the liquid reduces during cooking. Increase the heat to medium-high and bring the soup to a boil. Reduce the heat to medium and let it continue boiling for 15 minutes, stirring every few minutes to prevent the beans from sticking to the bottom of the pot. The broth should gradually reduce and become thicker and creamier. The vegetables should also be tender when pierced with a fork. If the soup gets too thick, add a splash of chicken broth or water until it reaches your preferred consistency. Add the ham and serve: Once the soup has thickened, stir the browned ham back into the pot to warm through. Give everything a taste before adding any salt, as the ham and chicken broth already contribute quite a bit! I didn’t need any extra salt in my batch, but I did add a little freshly cracked black pepper to each bowl. Serve hot and enjoy! What to Serve with Ham and Bean Soup This chunky ham and bean soup is a meal in a bowl! Between the ham, vegetables, and all those beans (which are super filling), you really don’t need much else to make a satisfying weeknight dinner. That said, I almost always serve some bread with my soup…it’s a must. 😋 A crusty baguette, sliced sourdough, or soft dinner rolls from the grocery store are all easy options. But my personal favorite here is a warm slice of cornbread. Its slightly sweet flavor pairs perfectly with the smoky, salty ham, and its tender, crumbly texture soaks up the creamy broth. If you want something fresh on the side, I’d go with a simple side salad. The crisp vegetables and tangy dressing offer a nice contrast to the warm, hearty soup, and it’s easy to throw together while the soup simmers. Shown here with a side of cornbread and a simple salad. Storage & Reheating This ham and bean soup makes great leftovers. Let it cool quickly, then transfer it to airtight containers and refrigerate within 2 hours. It’ll keep in the refrigerator for 3-4 days. The soup will naturally thicken as it sits because the beans will keep absorbing moisture. Reheating I like to reheat this soup on the stovetop over medium heat, stirring occasionally until it comes to a boil and is heated all the way through (165°F). Add a splash of chicken broth or water as it warms to loosen the consistency. You can also reheat individual servings in the microwave, stirring partway through so they heat evenly. Freezing This soup freezes really well, too! Once cooled, divide it into individual portions in freezer-safe containers or bags. I prefer to divide my soup into single servings before freezing, so they can be reheated as needed and in the amount needed. Quart-sized freezer bags are great for freezing soup, as are the small blue-top Ziploc food storage containers. Freeze for up to 3 months for the best quality. Got More Leftover Ham? Try These Recipes: Our Pea and Ham Salad is a creamy, no-cook side loaded with sweet peas, salty ham, cheddar cheese, and red onion for the classic sweet & savory combo. This Ham and Potato Casserole bakes up rich and bubbly, and is perfect for brunch! Ham Tetrazzini turns leftover ham into a rich and bubbly pasta bake with plenty of noodles, veggies, and from-scratch sauce. If you’ve got slices of leftover ham, these Glazed Ham Steaks are the PERFECT way to turn them into a deliciou https://www.budgetbytes.com/chunky-ham-and-bean-soup/ #soup #ham #flavor #rss #feeds #linksharing #qwibbit

#soup #ham #flavor #rss #feeds
KitchenNotes
KitchenNotes 4d

Chicken and Broccoli Skillet Lasagna This Chicken and Broccoli Skillet Lasagna is creamy, cheesy, and packed with tender chicken, broccoli, and soft lasagna noodles, all made in one pan! If you know me, you know I’m all about a good one-pot pasta, and this one takes me right back to those boxed pasta dinners I loved growing up. The difference? Everything here is made from scratch with simple ingredients and no mystery packets! There’s no boiling noodles separately or building layer after layer, either. It comes together in just 50 minutes, and costs only $1.53 a serving ($9.19 for the whole skillet!), which is always a win in my book. The Easy Way to Make a Creamy Chicken Lasagna Some nights, boiling pasta and tossing it with a jar of sauce is all I have the energy for. But when I’m craving something a little more special without spending ages layering a lasagna, this is my happy middle ground. And my favorite budget-friendly part? I only need 1 lb. of chicken breast (usually just 1-2 breasts!) to make six hearty servings, thanks to the noodles and broccoli bulking everything out. I season and sear the chicken first, then sauté the onion and garlic in the same skillet. The broken lasagna noodles cook right in the chicken broth, soaking up all the flavor from the garlic and Italian seasoning as they soften. It’s a similar idea to our skillet lasagna, but with a creamy chicken and broccoli twist! To keep this a true one-pot meal, I don’t cook the broccoli separately, either. I chop it finely, stems and all (because why waste them?!), and add it towards the end so it stays tender and bright green. Then a little heavy cream and Parmesan bring everything together in a rich, comforting sauce, and the mozzarella on top gives you a classic cheesy finish. If you’re in the mood for a more traditional, oven-baked version, our white chicken lasagna is another delicious option to try next. Jennie Alley making her chicken and broccoli skillet lasagna in our Nashville test kitchen. Recipe Success Tips Break the noodles into roughly 2-inch pieces. I find this size works well for stirring the lasagna noodles through the skillet without them getting tangled up. It makes scooping out individual servings much easier, too. Give everything enough room to cook. You’ll need a large, deep, broiler-safe skillet with a lid, about 12 inches in diameter. I recommend a heavy-bottomed skillet because it heats more evenly, helping the noodles cook at the same rate without sticking to the bottom (see the skillet I use in the photo above). Keep the lid on during simmering. Press the broken noodles down so they’re mostly submerged in the broth, then cover and maintain a gentle simmer. I give them an occasional stir to separate any pieces sticking together, then pop the lid straight back on. The trapped steam helps cook the noodles that aren’t completely covered by liquid. Leave a little liquid in the skillet! The noodles will keep absorbing moisture as the sauce comes together, so the mixture should still look slightly loose once the pasta and broccoli are tender. If the noodles are still firm but most of the broth has disappeared, add a splash of water or broth, cover, and let them cook a little longer. Nobody wants dry chicken and broccoli lasagna! Be gentle with the cream and cheese. I turn the heat down to low before stirring in the heavy cream, Parmesan, and shredded chicken. Boiling the sauce can make it separate or turn grainy. Also, keep a close eye on the mozzarella under the broiler. It only needs 2-4 minutes to turn bubbly and lightly golden. Bulk it up with more veggies! I’m all for using what I’ve got, and I think frozen peas, frozen corn, or drained canned corn would be delicious here! Add them with the broccoli so they have time to heat through. For firmer veggies like carrots, dice them small and sauté them with the onion so they have longer to soften. A couple handfuls of fresh or frozen spinach would also be lovely, like I use in my vegetarian stovetop lasagna. Just stir it in near the end until wilted. Print Add to Collection Go to Collections Chicken and Broccoli Skillet Lasagna This creamy Chicken and Broccoli Skillet Lasagna recipe makes 6 servings in just 50 minutes! Tender chicken, broccoli, and cheesy noodles, all made in one pan. Course Main Course Cuisine American Total Cost $9.19 recipe / $1.53 serving Prep Time 15 minutes minutes Cook Time 35 minutes minutes Total Time 50 minutes minutes Servings 6 servings (1½ cups) Calories 529kcal Author Jennie Alley Equipment Large Oven-Safe Deep Skillet with Lid Ingredients 1¼ tsp salt $0.08 1 tsp black pepper freshly cracked, $0.08 1 tsp paprika $0.04 1 tsp garlic powder $0.04 1 tsp onion powder $0.03 1 tsp Italian seasoning $0.04 1 lb. chicken breast 1-2 breasts, (sliced in half horizontally) $2.57* 1 small yellow onion diced, (1 cup) $0.40 3 garlic cloves minced, $0.27 2 broccoli crowns finely chopped, (3 cups) $1.49** 1 Tbsp cooking oil $0.04 8 oz. lasagna noodles broken into 2-inch pieces, (9-10 noodles) $0.92*** 4 cups chicken broth $0.51**** ¾ cup heavy cream $1.11 1 cup mozzarella cheese shredded, $0.98 ½ cup Parmesan cheese grated, $0.59 US Customary – Metric Instructions Gather all ingredients. Stir together salt, black pepper, paprika, garlic powder, onion powder, and Italian seasoning in a small bowl. Slice chicken breast in half and season thoroughly with half of seasoning blend. Finely chop the broccoli, including the stems, dice the onion, and mince the garlic. Heat olive oil in a large, deep oven-safe skillet medium-high heat. Sear chicken 4-5 minutes per side until fully cooked through (165℉ internally). Remove and set aside. Reduce heat to medium and In the same skillet, add onion and garlic and sauté for 3-4 minutes until softened. Add chicken broth and broken noodles. Stir and press noodles down so they’re mostly submerged. Cover and simmer on medium-low for 8-10 minutes, stirring occasionally. Stir in the broccoli and reserved seasoning mixture. Cover and continue cooking for 4-5 minutes, or until the noodles are tender and the broccoli is bright green. The mixture should still look slightly loose. If needed, add a splash of water to loosen it. While the noodles finish cooking, shred the chicken into bite-sized pieces. Reduce the heat to low and stir in the heavy cream, Parmesan cheese, and shredded chicken until well combined and creamy. Be careful not to allow the mixture to boil to avoid curdling. Sprinkle the mozzarella evenly over the top. Transfer the skillet to the oven and broil for 2-4 minutes, or until the cheese is melted, bubbly, and lightly browned. Remove from the oven and allow to cool for 3-5 minutes before serving. Enjoy! See how we calculate recipe costs here. Notes *The recipe cost is based on buying chicken breasts in value packs, which are usually cheaper per pound. I portion them into 1 lb. servings for the freezer so I can thaw what I need for recipes like this (about 1-2 breasts). You can also use 1 lb. of boneless, skinless chicken thighs instead. Cooking times may vary, so make sure the thickest part reaches 165°F. **Frozen broccoli can be used in a pinch, but thaw and chop it finely first. The texture will be softer and more integrated into the sauce compared to fresh broccoli, which holds its shape better. For the best results, I recommend fresh broccoli here. ***This recipe uses 8 oz. of dried lasagna noodles (about 9-10 sheets), broken into roughly 2-inch pieces. There’s no need to boil them first! Fresh and oven-ready lasagna sheets can cook much faster and absorb liquid differently, so I recommend sticking with regular dried lasagna sheets for the most reliable results. ****I tested and costed this recipe using Better Than Bouillon. If you’re using a different broth or stock, the seasoning levels may vary. Taste before serving and adjust the salt as needed. If the pasta absorbs too much liquid before becoming tender, add a splash of water or broth as needed. Skillet safety: Make sure your skillet and handle are oven-safe and suitable for broiling. Remove the lid before broiling, and don’t forget that the handle will be VERY hot when you take the skillet out of the oven! Make Ahead Tips -You can prep the ingredients up to 2 days in advance by slicing the chicken, chopping the vegetables, and mixing the seasoning blend. Store everything separately in airtight containers in the refrigerator. –The chicken can also be fully cooked ahead of time and stored in the refrigerator for up to 2 days before using. Shred it just before adding it to the skillet. Nutrition Serving: 1.5cups | Calories: 529kcal | Carbohydrates: 47g | Protein: 36g | Fat: 23g | Sodium: 1495mg | Fiber: 7g how to make Chicken and Broccoli Skillet Lasagna Step-by-Step Photos Gather all your ingredients: If you’re using a bouillon like I am (I use Better Than Bouillon), mix it with water according to the package directions to make your chicken broth now. Mix the seasonings and prepare the chicken: In a small bowl, combine 1¼ tsp salt, 1 tsp black pepper, 1 tsp paprika, 1 tsp garlic powder, 1 tsp onion powder, and 1 tsp Italian seasoning. Slice 1 lb. chicken breasts in half horizontally to create thinner cutlets. Season both sides with half the spice mixture, saving the rest for later. Prep the vegetables: Finely chop 2 broccoli crowns (270g, about 3 cups), including the tender stems, dice 1 small yellow onion (140g, about 1 cup), and mince 3 cloves garlic. Keep the broccoli pieces small so they cook quickly and mix evenly with the noodles. Sear the chicken: Heat 1 Tbsp oil in a large, deep, oven-safe skillet over medium-high heat. Add the seasoned chicken and cook for about 4-5 minutes per side, until lightly golden and the thickest part reaches an internal temperature of 165°F. Transfer the chicken to a plate and set aside. Leave those flavorful browned bits in the skillet. Sauté the onion and garlic: Reduce the heat to medium and add the diced onion and minced garlic to the same skillet. Cook for 3-4 minutes, stirring frequently, until the onion softens and becomes translucent and the garlic smells fragrant. Stir across the bottom of the skillet to loosen the browned bits left behind by the chicken. Add the noodles and broth: Pour in 4 cups chicken broth and add 8 oz. broken lasagna noodles (about 9-10 sheets, broken into roughly 2-inch pieces). Stir to distribute the noodles, pressing them down so they’re mostly covered by the broth. Don’t worry if a few pieces stick out! Cover the skillet, reduce the heat to medium-low, and simmer gently for 8-10 minutes. Stir occasionally to separate any pieces sticking together, then replace the lid. Add the broccoli and remaining seasoning: Stir in the 3 cups chopped broccoli and the reserved seasoning mixture. Cover and cook for another 4-5 minutes, or until the noodles are tender and the broccoli is bright green. The mixture should still look slightly loose and saucy. If the noodles need more cooking time but the liquid is running low, add a splash of water or broth. Shred the chicken: As the noodles finish cooking, use two forks to pull the cooked chicken into bite-sized shreds. I like keeping the pieces fairly small so there’s plenty of chicken throughout the finished skillet. Make it creamy! Turn the heat down to low and stir in ¾ cup heavy cream, ½ cup grated Parmesan, and the shredded chicken. Gently mix until everything is coated in a creamy sauce and the chicken is heated through. Avoid letting the mixture boil vigorously, as this can affect the texture of the cream sauce. Add the mozzarella and broil: Sprinkle 1 cup shredded mozzarella evenly over the skillet. Transfer it to the oven and broil for 2-4 minutes, until the cheese is melted, bubbling, and lightly golden brown in spots. Keep an eye on it so the cheese doesn’t burn! Rest and serve: Carefully remove the skillet from the oven and let the lasagna sit for 3-5 minutes. The sauce will thicken slightly as it rests, leaving you with tender noodles, shredded chicken, and broccoli in a creamy, cheesy sauce. Scoop into bowls and enjoy! What to Serve with Chicken and Broccoli Skillet Lasagna I like serving this pasta warm, straight from the skillet, with a little extra Parmesan sprinkled over the top. A squeeze of fresh lemon juice or a little lemon zest just before serving also brightens the creamy sauce, and a pinch of red pepper flakes adds a little heat if desired. This creamy chicken broccoli lasagna skillet makes 6 hearty servings of about 1½ cups each, so if I want anything extra, I find a small side is plenty enough. I like serving this dish with a fresh salad and a lemony vinaigrette to balance out the creamy sauce. Our Mediterranean coleslaw and green bean salad are both delicious options, and you can prep either one ahead of time! I’d just go with whichever you already have the ingredients for to keep things easy and budget-friendly. A slice of garlic bread is also a no-brainer! I like making a batch of our homemade freezer garlic bread, then pulling out a few slices whenever I need them. Toasted sourdough is another easy option, or, if you’ve planned ahead, our no-knead focaccia is lovely for mopping up any leftovers. Mediterranean Coleslaw$7.21 recipe / $1.20 serving Green Bean Salad$9.23 recipe / $1.15 serving Homemade Freezer Garlic Bread$3.02 recipe / $0.25 per slice No Knead Focaccia Bread$1.31 recipe / $0.11 serving Storage & Reheating Store leftovers in an airtight container in the fridge for up to 3-4 days. Let it cool slightly before transferring it to your container, and refrigerate within 2 hours of cooking. The noodles will absorb the sauce as they sit, so expect leftovers to be a little thicker. Reheating I recommend reheating individual portions gently in the microwave or in a skillet over low heat. Add a splash of milk or chicken broth to loosen the sauce and bring back that creamy consistency. Stir occasionally until heated through to 165°F, being careful not to overheat the sauce. Freezing This recipe is best enjoyed fresh, but you can freeze leftovers if needed! Let the chicken and broccoli lasagna cool, then transfer it to airtight, freezer-safe containers and freeze for up to 2 months. Thaw overnight in the fridge before reheating gently in the microwave or on the stovetop. I recommend adding a splash of milk or broth to help restore the creaminess, as the sauce may separate slightly after freezing and the noodles will be softer. More Lasagna Recipes to Try Our Homemade Lasagna is a classic for a reason, with a hearty Italian sausage and tomato sauce, ricotta, and plenty of melted cheese. I also put a budget-friendly spin on Seafood Lasagna using shrimp and imitation crab instead of expensive seafood. It’s creamy, cheesy, and perfect when you want something a little different! Or for a veggie-packed option, try my Butternut Squash Lasagna! It layers roasted squash with mushrooms, kale, and a creamy sage brown butter sauce for a deliciously cozy dinner. Other Chicken and Broccoli Recipes Chicken Broccoli Casserole$8.75 recipe / $2.18 serving White Cheddar Mac and Cheese with Chicken and Broccoli$6.66 recipe / $1.67 serving Pesto Chicken and Broccoli Salad$6.18 recipe / $1.55 serving Chicken and Rice Casserole$7.60 recipe / $1.27 serving The post Chicken and Broccoli Skillet Lasagna appeared first on Budget Bytes. https://www.budgetbytes.com/chicken-and-broccoli-skillet-lasagna/ #skilletlasagna #broccoliskillet #chicken #creamychicken #everything #easyway #keep #make #rss #feeds #linksharing #qwibbit

#skilletlasagna #broccoliskillet #chicken #creamychicken #everything
KitchenNotes
KitchenNotes 6d

13 Easy Sheet Pan Dinners If there’s one thing I appreciate when cooking dinner for my family, it’s a meal that doesn’t leave me with a mountain of dirty dishes! That’s why I’m such a big fan of sheet pan dinners. Most of the cooking happens right in the oven, so there’s less time spent standing over the stove and more time to get on with everything else. And you can do SO much with a simple baking sheet. From juicy chicken and roasted veggies to homemade pizza, crispy tacos, and meatless meals, I’ve rounded up 13 easy sheet pan dinners that’ll help you save time, money, and a whole lot of washing up! Chicken Sheet Pan Dinners Packed with Flavor Chicken is one of the easiest meats to find at the grocery store, and there are loads of ways to prepare it. It’s also a great choice for sheet pan dinners because it cooks relatively quickly and takes on all sorts of delicious seasonings and sauces. Winner winner chicken dinner! 1. Sheet Pan Chicken Fajitas Sheet Pan Chicken Fajitas These easy Sheet Pan Chicken Fajitas are a simple hands-off way to get that smoky-sweet flavor of traditional griddle fajitas. 4.79 from 415 votes $10.19 recipe / $2.55 serving Get the Recipe Who says you need a sizzling skillet to make fajitas?! These sheet pan chicken fajitas have all those delicious smoky spices, tender chicken, and roasted peppers and onions, but with far less hands-on cooking. I’d serve these family-style, placing the sheet pan in the middle of the table with warm tortillas and everyone’s favorite toppings. That way, everyone can build their fajitas exactly how they like them. 2. Sheet Pan Honey Mustard Chicken Sheet Pan Honey Mustard Chicken and Veggies This Sheet Pan Honey Mustard Chicken and Veggies is a family favorite! Sweet, tangy sauce, hearty roasted vegetables, and juicy chicken thighs made in one pan. 4.38 from 8 votes $8.45 recipe / $2.11 serving Get the Recipe This sheet pan honey mustard chicken recipe pairs budget-friendly chicken thighs with potatoes, green beans, carrots, and onions, all coated in a sweet and tangy homemade honey mustard sauce. Our readers have had fun switching up the vegetables, too, adding everything from broccoli to parsnips and butternut squash. Just don’t skip that honey mustard sauce! It’s what brings everything together. 3. Sheet Pan Greek Chicken and Vegetables Sheet Pan Chicken and Vegetables An easy homemade lemon garlic marinade transforms simple ingredients into a flavorful Sheet Pan Greek Chicken and Vegetable dinner. Perfect for weeknights! 4.93 from 26 votes $13.30 recipe / $3.33 serving Get the Recipe Lemon, garlic, and oregano give this sheet pan Greek-inspired chicken and vegetables a bright, savory flavor…then some feta and Kalamata olives make it even better! It takes about 50 minutes from start to finish, including a 10-minute head start for the tomatoes, peppers, and onions. My tip? Pound the chicken breasts to an even thickness before roasting so they’re ready at roughly the same time as the veggies. 4. Sheet Pan Pesto Chicken Sheet Pan Pesto Chicken Dinner Sheet Pan Pesto Chicken Dinner is an easy to execute, simple yet elegant, and flavorful weeknight dinner that you’ll want to add to your weekly rotation! 4.77 from 21 votes $11.99 recipe / $3.00 serving Get the Recipe A little pesto can go a long way! This easy sheet pan pesto chicken dinner uses only ¼ cup to flavor four servings of chicken, paired with roasted tomatoes, baby potatoes, and melted mozzarella. I’d look for an inexpensive store-brand pesto and freeze any leftovers in small portions for future meals. It’s a simple way to stretch one jar across several dinners! 5. Sheet Pan Sweet and Sour Chicken Sheet Pan Sweet and Sour Chicken This oven baked Sheet Pan Sweet and Sour Chicken is a little more forgiving than a fast moving, high heat stir fry, making it great for beginners! 4.48 from 38 votes $9.93 recipe / $1.66 serving Get the Recipe A takeout favorite, made easier in the oven (say LESS!) This family-friendly sheet pan sweet and sour chicken has juicy pineapple, bell peppers, onions, and bite-sized chicken pieces, all tossed in a homemade sticky, tangy sauce. My family absolutely looooves this one! I also appreciate that the oven roasts everything while you prepare the sauce, instead of managing a fast-moving stir-fry. Spoon it over fluffy rice, and dinner is sorted before you know it. BBQ Favorites There’s something just so good about BBQ sauce once it’s been heated in the oven. The sugars start to caramelize, creating a glossy, sticky coating with extra flavor around the edges. And you don’t need to fire up the grill to get those delicious barbecue flavors! These easy sheet pan dinners turn two family favorites, meatballs and meatloaf, into simple sheet pan meals with minimal cleanup. 6. Sheet Pan BBQ Meatballs Sheet Pan BBQ Meatballs These Sheet Pan BBQ Meatballs are easy, colorful, and delicious. Plus the leftovers hold up great, so they're meal prep friendly! 4.81 from 36 votes $7.84 recipe / $1.96 serving Get the Recipe These ground turkey sheet pan BBQ meatballs roast alongside sweet pineapple, peppers, and onions, with bottled BBQ sauce doing double duty as a seasoning and glaze. You can fit everything onto one sheet pan, although I’d use two if you have them to give the veggies more room to caramelize. Add a side of rice, and you’ve got four satisfying servings that are great for meal prep, too. 7. Sheet Pan BBQ Meatloaf Sheet Pan BBQ Meatloaf Dinner Make an entire dinner for two at one time with this fast and easy Sheet Pan BBQ Meatloaf Dinner. Perfect for meal prep! 4.80 from 88 votes $6.87 recipe / $3.43 serving Get the Recipe Meatloaf is an all-American comfort food classic, so of course we had to give it the sheet pan treatment AND a BBQ makeover! Instead of one large loaf, this sheet pan BBQ meatloaf recipe makes two individual beef meatloaves with a sticky barbecue topping. Sweet potatoes and frozen broccoli roast on the same pan, so you’ve got your main and two sides taken care of. I especially like that you can cook the vegetables straight from frozen, saving time and reducing waste! 🥦 Make It a Sheet Pan Night One of my favorite ways to keep the grocery bill down is to recreate our favorite takeout orders at home. It’s much cheaper than ordering in, and using a sheet pan makes some of those traditionally hands-on meals surprisingly easy! 8. Sheet Pan Tacos Crispy Sheet Pan Tacos These easy Sheet Pan Tacos bake up golden and crispy with ground turkey, refried beans, Monterey Jack cheese, and a quick sour cream-lime dipping sauce. 4.13 from 16 votes $7.94 recipe / $1.32 serving Get the Recipe We love Mexican night at my house, and these sheet pan tacos make it so much easier! Instead of standing over the stove cooking and flipping individual tacos, I can bake 12 crispy tacos together in just 25-35 minutes. They’re filled with seasoned ground turkey, refried beans, and Monterey Jack cheese, with a creamy dipping sauce on the side. You can use corn or flour tortillas, depending on what you’ve already got. Just warm them first, so they fold without breaking! 9. Sheet Pan Pizza Sheet Pan Pizza Sheet Pan Pizza is a low-effort recipe guaranteed to make any occasion special and satisfy cravings for take-out pizza at half the cost. 5 from 15 votes $9.92 recipe / $1.41 serving Get the Recipe There’s something wonderfully nostalgic about a big rectangular pizza cut into slices. It gives me serious school cafeteria pizza vibes, only this homemade version has a thick, fluffy focaccia-style crust and loads of delicious toppings! And at around $1.41 per serving, this sheet pan pizza is a budget-friendly alternative to ordering pizza. The dough does need time to rise, so I’d plan ahead for this one. 10. Sheet Pan Doner Kebab Sheet Pan Doner Kebab This Sheet Pan Doner Kebab is an easy oven shortcut for thin, crispy beef served gyro-style in soft pita with tzatziki and fresh vegetables. 4.80 from 5 votes $11.05 recipe / $2.76 serving Get the Recipe Homemade doner kebabs without a giant rotating spit in your kitchen?! YES, it’s possible! This sheet pan doner kebab is a clever way to recreate this takeout favorite on a budget. Just mix ground beef with grated onion, garlic, and savory spices, roll it thin in parchment paper, then bake and broil for those delicious crispy edges. Pile it into warm pita with homemade tzatziki and fresh veggies, and you’ve got a takeout-style dinner in about 30 minutes. Meatless Options Skipping meat a few nights a week is one of the easiest ways to bring down your grocery bill! Ingredients like tofu and mushrooms can make incredibly filling meals without the cost of meat (I promise!). And if you’re looking for an easy place to start, these meatless sheet pan dinners make the switch pretty irresistible. 11. Sheet Pan Cajun Tofu and Vegetables Sheet Pan Cajun Tofu and Vegetables This Sheet Pan Cajun Tofu and Vegetables is a one-pan, budget-friendly, low-stress, flavor-packed dream featuring crispy Cajun seasoned tofu and roasted veggies. 4.38 from 8 votes $7.50 recipe / $1.88 serving Get the Recipe If you’ve tried my baked tofu recipe, you’ll know I’m a BIG fan of what a little oven time can do for a block of tofu! This Cajun tofu and veggies version takes things up a notch with bold, spicy seasoning, crispy tofu, roasted potatoes, peppers, and onions. Then finish it with a sweet-and-spicy butter drizzle (use plant-based butter to keep it vegan!). It’s affordable, filling, and seriously flavorful. Maybe I’m biased because I love baked tofu anyway, but I think this one could win over a few tofu skeptics! 12. Portobello Fajitas Sheet Pan Portobello Fajitas Sheet Pan Portobello Fajitas are an easy and flavorful vegetarian dinner idea that all cooks on one pan for easy cleanup! 4.79 from 37 votes $10.81 recipe / $2.70 serving Get the Recipe I LOVE portobello mushrooms. They soak up whatever seasonings you throw at them, and their hearty texture makes them a fantastic meat substitute! In these sheet pan portobello fajitas, they’re sliced and roasted with bell peppers, onions, and a smoky chipotle seasoning until juicy and browned around the edges. If you prefer things a little milder, I’d swap the chipotle powder for smoked paprika for a delicious smoky flavor without the extra heat. 13. Sheet Pan Mushroom Steak Dinner One Pan “Mushroom Steak” Dinner This vegan One Pan Mushroom Steak Dinner has juicy portobello mushroom steaks, roasted potatoes, and fresh veggies all cooked together on one sheet pan. 5 from 2 votes $12.27 recipe / $3.06 serving Get the Recipe Since I’m already talking mushrooms…I couldn’t leave out my one pan mushroom steak dinner! I use a simple marinade of balsamic, soy sauce, garlic, and thyme to give the portobello caps an incredibly savory flavor. I’ve timed the roasting so the potatoes go in first, then the mushrooms, followed by the asparagus and tomatoes. Everything finishes cooking together, so you don’t have to juggle separate pots or watch sides get cold while you wait. It’s a complete, satisfying meatless dinner made on one sheet pan! More Recipe Roundups Cheap And Easy Family Dinners Quick And Easy Weeknight Dinner Ideas 26 Cozy Casserole Recipes Best Homemade Soup Recipes The post 13 Easy Sheet Pan Dinners appeared first on Budget Bytes. https://www.budgetbytes.com/sheet-pan-dinners/ #sheetpan #panchicken #pandinners #panhoney #easysheet #honeymustard #pangreek #fajitas #recipe #get #rss #feeds #linksharing #qwibbit

#sheetpan #panchicken #pandinners #panhoney #easysheet
KitchenNotes
KitchenNotes 7d

Stuffed Pepper Soup This Stuffed Pepper Soup has all the cozy flavors of classic stuffed peppers, with browned, savory ground beef, tender bell peppers, onions, and garlic simmered in a rich, generously seasoned tomato broth. I honestly could not stop eating it! It’s easy, hearty, satisfying, and you get all that familiar flavor without the extra steps of stuffing peppers. I serve it over fluffy rice and, don’t worry, I didn’t forget the cheese! A sprinkle of mozzarella gives you that irresistible cheese pull. Better yet, it’s ready in just 45 minutes and costs only $1.97 per serving. Perfect for soup season, or any season! Big Flavor from a Simple Shopping List I already love classic stuffed bell peppers, but this soup makes enjoying those same flavors so much easier on a weeknight. In most stuffed pepper recipes, the rice goes straight into the filling. For this soup, though, I prefer to keep it separate until serving. Rice soaks up liquid like a sponge, and I found that stirring it straight into the pot made the rice mushy. And by the next day, there was barely any broth left! Instead, I like to spoon the rice into individual bowls and ladle the soup over the top. It’s such a simple step, but it makes a big difference…especially when I’m saving leftovers. I also make the most of my cooking time by getting the rice going while I prepare the soup. Once the ground beef and veggies (bell peppers, onion, and garlic) are cooked, I simmer everything for 15 minutes in a rich tomato broth packed with herbs. And, of course, I wanted to keep this soup easy on the grocery budget, too. I use green bell peppers (which are usually cheaper than red, yellow, or orange), canned tomatoes, dried herbs, and Better Than Bouillon for the broth. Nothing fancy or expensive, but plenty of flavor! These simple ingredients help me stretch just one pound of ground beef into six hearty servings. 😋 Recipe Success Tips Let those peppers stand out! I cut my bell peppers and onion into a medium dice because I like them to have some texture and really stand out in the finished soup. Keep the pieces roughly the same size so they cook evenly. After the sauté and 15-minute simmer, the peppers should be tender enough to pierce with a fork but still hold their shape. If they’re a little firm, give the soup a few more minutes. Remove the excess grease. Depending on the type of ground beef you use (I use 27% fat), quite a bit of grease can collect in the pot as it cooks. Make sure to carefully blot up the excess with a paper towel so your soup doesn’t end up oily. You can also spoon the grease into a heatproof container, let it cool, and discard it in the trash. Just don’t pour it down the sink! Make it as brothy as you like. Prefer a slightly thinner soup? Stir in a splash of extra beef broth or water until you’re happy with the consistency. If there’s more liquid than you’d like, let it simmer uncovered for a few extra minutes, stirring occasionally. I recommend tasting and adjusting the seasoning before serving. Got extra veggies? Throw them in! This soup is a great way to use up whatever you’ve got. Diced carrots or celery can go in with the peppers and onion, although carrots may need a little longer to soften. Corn can be added with the tomatoes and broth, and fresh spinach only needs a minute or two at the end. You can even add diced potatoes (I’d dice them small, like in our vegetable beef soup), but they’ll need a longer simmer and possibly some extra broth! Budget-Saving Tip When I make stuffed peppers at home, I typically use ground beef. However, the ground beef makes up about half the cost of this entire pot of soup, so it’s also a great place to save some money. Feel free to use ground chicken, turkey, pork, or sausage instead. (You can even try lentils!) Higher-fat ground beef is often cheaper than lean, and it’s totally fine to use here. Just drain off the excess fat after browning so your soup doesn’t end up oily. If you still want some beef in your soup but need to stretch your budget further, try ½ lb. ground beef with 1 cup cooked brown or green lentils. Brown the beef as directed, then stir in the cooked lentils with the tomatoes and broth to heat through during the final simmer. We use a similar meat-stretching trick in our lentil and sausage stew, and it’s a great way to make a little meat go further. Print Add to Collection Go to Collections Stuffed Pepper Soup This easy Stuffed Pepper Soup is loaded with savory ground beef and tender bell peppers in a rich tomato broth. Served over fluffy rice and ready in 45 minutes! Course Soup Cuisine American Total Cost $11.84 recipe / $1.97 serving Prep Time 15 minutes minutes Cook Time 30 minutes minutes Total Time 45 minutes minutes Servings 6 servings (1 heaping cup of soup & ½ cup rice) Calories 434kcal Author Melissa Nolan Equipment Medium Pot with Lid, Large Pot, or Dutch Oven Ingredients 1 cup long-grain white rice uncooked, $0.35* 2 cups water $0.00 1 Tbsp vegetable oil $0.04 1 lb. ground beef $5.94** 2 green bell peppers medium dice, (2½ cups) $1.64*** 1 onion small dice (2 cups) $0.47 2 garlic cloves minced, (1 Tbsp) $0.12 1½ tsp salt $0.06 1 tsp black pepper freshly cracked, $0.16 14.5 oz. can diced tomatoes with juices, $0.96 15 oz. can tomato sauce $0.96 2 cups beef broth $0.26**** 1 tsp dried oregano $0.04 ½ tsp dried basil $0.02 ¼ tsp dried parsley $0.02 ¼ tsp paprika $0.01 1 cup mozzarella cheese grated, $0.79***** US Customary – Metric Instructions Gather and prepare all ingredients. Add the rice and water to a medium pot with a lid. Bring to a boil, then turn the heat to a simmer. Cover with a lid and cook for 20 minutes. Turn off the heat and set aside. While the rice is simmering, in a large pot over medium heat, add the vegetable oil. Once hot, add the ground beef and cook for 5 minutes, breaking it up as it cooks. Using paper towels, blot up excess grease. Next, add the bell peppers, onions, garlic, salt, and pepper. Cook for 5 minutes, stirring occasionally, until the vegetables have softened slightly. Add the canned diced tomatoes with their juices, tomato sauce, beef broth, dried oregano, dried basil, dried parsley, and paprika, stir to combine. Bring the soup to a simmer. Cook for 15 minutes to thicken and develop flavors. Fluff the cooked rice with a fork and divide into bowls. Ladle one heaping cup of the stuffed pepper soup on the rice and sprinkle with mozzarella cheese. See how we calculate recipe costs here. Notes *I always have long-grain white rice on hand. Feel free to use whatever you have, but make sure to follow the instructions on the packaging, as they may need different cooking times. You can even try cauliflower rice! **Any ground beef fat % works (I use 73/27 in the photos here), or you can swap in ground pork, chicken, turkey, sausage, or cooked lentils. ***I use green bell peppers when making this soup because I love the flavor, pop of color in the soup, and the price! You can use any color you desire (red, orange, yellow), or even try poblanos in honor of our stuffed poblano peppers. *****I like to use Better Than Bouillon to make broths to keep costs low. *****Every time my mom made stuffed peppers, she would sprinkle the tops generously with cheese. I made sure to do the same with this soup! I use mozzarella cheese, but feel free to use your favorite, like cheddar, provolone, or Swiss. Make the seasonings your own! I use dried oregano, basil, parsley, and paprika for a savory, herby tomato broth. But you can also try a pinch of dried thyme, garlic powder, onion powder, or a bay leaf (just remove it before serving). For a little kick, add hot sauce or some Cajun seasoning. Go easy with the Cajun seasoning at first, since some blends already contain plenty of salt. I also tested the recipe as a one-pot dish. I added the rice and two additional cups of beef broth to the pot. The soup is still delicious BUT(!) the longer the rice sits, the mushier it gets, and it also absorbs much of the liquid, so it becomes less of a soup and more of a thick stew. So, I decided to cook the rice separately, as shown here, and much prefer the results. Nutrition Serving: 1serving (1 heaping cup of soup & ½ cup rice) | Calories: 434kcal | Carbohydrates: 36g | Protein: 22g | Fat: 22g | Sodium: 1488mg | Fiber: 3g how to make Stuffed Pepper Soup step-by-step photos Gather all of your ingredients: Cut 2 green bell peppers into a medium dice, finely dice 1 onion, and mince 2 garlic cloves. I like to get the chopping done first since the rice and soup cook at the same time. Cook the rice: Add 1 cup uncooked long-grain white rice and 2 cups water to a medium saucepan with a lid. Bring to a boil, then reduce the heat to a gentle simmer. Cover and cook for 20 minutes, or until the rice is tender and the water has been absorbed. Turn off the heat and set aside. (This is the same technique we use in our ‘how to cook rice’ guide). Brown the ground beef: While the rice simmers, heat 1 Tbsp vegetable oil in a large pot over medium heat. Once the oil is hot, add 1 lb. ground beef and cook for about 5 minutes, breaking it into small crumbles as it cooks. The beef should be cooked through, with no pink remaining. Remove the excess grease: Carefully blot up any excess grease from the beef using paper towels. This helps prevent an oily layer from forming on top of the finished soup. Soften the vegetables: Add the 2 diced green bell peppers, 1 diced onion, 2 minced garlic cloves, 1½ tsp salt, and 1 tsp black pepper to the pot with the beef. Cook for 5 minutes, stirring occasionally. The onions and peppers should start to soften but still have some texture. Add the tomatoes and seasonings: Pour in one 14.5 oz. can of diced tomatoes (including the juices), one 15 oz. can of tomato sauce, and 2 cups beef broth. Add 1 tsp dried oregano, ½ tsp dried basil, ¼ tsp dried parsley, and ¼ tsp paprika. Stir everything together until the seasonings are evenly distributed throughout the tomato broth. Simmer the soup: Bring the mixture to a gentle simmer and cook for 15 minutes to allow the flavors to develop and the broth to thicken slightly. The bell peppers should be tender enough to pierce easily with a fork while still holding their shape. If they’re still too firm, let the soup simmer a little longer. Serve with rice and cheese: Fluff the cooked rice with a fork and divide it evenly among six serving bowls (about ½ cup per bowl). Ladle a heaping cup of stuffed pepper soup over each portion of rice, then sprinkle with the shredded mozzarella (1 cup total). Serve warm and enjoy! (For a bonus, I sprinkled fresh parsley on top. Most fresh herbs would be a great garnish, like basil, thyme, or chives, or you can enjoy the recipe as is!) What to Serve with Stuffed Pepper Soup I love this recipe because it can be a complete meal all on its own. With ground beef, rice, and plenty of veggies, it’s hearty, satisfying, and makes 6 complete servings. But if you want to add a side, I recommend a Caesar salad for some fresh crunch or homemade garlic bread to soak up that delicious tomato broth. Our air fryer asparagus is another great option if you want some extra greens on the table. It takes less than 10 minutes to make, so I’d just pop it in the air fryer during the final simmer! Or, sprinkle some homemade croutons right over the soup for a little crunch. They’re also a great way to use up leftover bread. Caesar Salad$8.50 recipe / $1.42 serving Homemade Garlic Bread$4.63 recipe / $0.39 serving Air Fryer Asparagus$4.07 recipe / $1.02 serving How to Make Homemade Croutons$0.71 recipe / $0.18 serving Storage & Reheating I recommend storing any leftover rice and soup separately because the rice will continue absorbing the broth as it sits. Let everything cool promptly, then transfer to separate airtight containers and refrigerate for up to 3-4 days. Reheating Reheat the soup in a saucepan over medium heat, stirring occasionally, or in the microwave until heated through. Warm the rice separately in the microwave (with a splash of water, stirring every 15-30 seconds until hot), then spoon the soup over the top. If you’ve already mixed the rice into the soup and it’s become too thick, add a splash of beef broth or water to thin it out as it reheats. Freezing You can freeze leftover stuffed pepper soup for up to 3 months in freezer-safe containers. I recommend freezing the rice separately to keep it from getting mushy. Thaw overnight in the refrigerator, or use the thaw setting on your microwave, then reheat thoroughly before serving. Try these Cozy Soups with Ground Beef Next If you love the savory ground beef and tomato broth in this recipe, try our Beef and Cabbage Soup. It’s made with tender cabbage, ground beef, and simple herbs for another hearty, budget-friendly meal! Our Lasagna Soup is perfect when I’m craving those same savory tomato and herb flavors, but with tender pasta and a deliciously cheesy topping. For a different spin on ground beef soup, I recommend our Easy Taco Soup, which is packed with beans, corn, and bold taco seasonings, plus plenty of room for your favorite toppings. More Stuffed Pepper Recipes Stuffed Bell Peppers$10.36 recipe / $1.72 serving Stuffed Pepper Skillet$12.20 recipe / $2.03 serving Philly Cheesesteak Stuffed Peppers$13.66 recipe / $3.41 serving Buffalo Chicken Stuffed Peppers$11.45 recipe / $1.91 serving The post Stuffed Pepper Soup appeared first on Budget Bytes. https://www.budgetbytes.com/stuffed-pepper-soup/ #stuffedpepper #soup #rice #flavor #simple #let #make #keep #shoppinglist #better #rss #feeds #linksharing #qwibbit

#stuffedpepper #soup #rice #flavor #simple
KitchenNotes
KitchenNotes 8d

Chocolate Almond Cake Meet my new favorite chocolate cake recipe! It’s rich, chocolatey and indulgent, and secretly somewhat wholesome. Almond flour forms the base, which is why this cake is wonderfully tender and well-suited for gluten-free eaters. The cocoa powder largely covers up the almond flavor, though. It’s simply delicious. This cake is plenty sweet but not too sweet, so it’s perfect if you enjoy dark chocolate. You can play up the almond factor by topping it with sliced almonds for a fun everyday snacking cake, or turn it into a special birthday treat by spreading frosting on top. I prefer this one to most bakery cakes! The recipe is easy to stir together by hand. I’ve made it with our five-year-old’s help several times. I don’t think you could mess it up if you tried. If you’re familiar with Italian torta Caprese or French chocolate financiers, this cake reminds me a bit of both. Continue to the recipe... The post Chocolate Almond Cake appeared first on Cookie and Kate. https://cookieandkate.com/chocolate-almond-cake/?adt_ei=*|EMAIL|* #cake #almond #chocolate #caprese #french #rss #feeds #linksharing #qwibbit

#cake #almond #chocolate #caprese #french
KitchenNotes
KitchenNotes 9d

Smothered Pork Chops I love pork chops, and I feel like they’re under appreciated. Some people think pork chops are dry and boring. Let me tell you, I completely disagree! These Smothered Pork Chops are a Southern staple, packed with flavor and seared to perfection. And the best part? The whole thing comes together in one skillet in just 35 minutes, with simple ingredients and a homemade onion gravy that’s good enough to eat by the spoonful. Grab some mashed potatoes because you’re going to want every last drop of that gravy! A Good Sear Makes an Even Better Gravy Everyone has their own way of making Southern smothered pork chops, and this is mine! My secret is seasoning, dredging, and searing the pork chops over medium-high heat first. The light flour coating helps create a delicious, slightly crisp golden crust, and all those tasty browned bits left behind in the skillet add even more flavor to the homemade gravy. I always set the chops aside while I make the gravy, too. Those lean cuts can overcook quickly, and nobody wants tough pork chops for dinner! Then, don’t even get me started on the gravy. I make it from scratch with onions and garlic (the backbone of any good sauce, if you ask me! 😉). I give the onions time to soften and start browning, bringing out their natural sweetness and adding another layer of flavor to the sauce. A little flour helps thicken everything up, then chicken broth (I use Better Than Bouillon to save money) and a splash of heavy cream give the gravy a rich, luxurious finish. Comfort on a plate without spending a fortune! If you’re a gravy lover like me, you’ll also want to try our Salisbury steak next. It’s another budget-friendly favorite with plenty of homemade gravy. Melissa Nolan serving her smothered pork chops in our Nashville test kitchen. Recipe Success Tips Keep those pork chops juicy! I use boneless pork chops in this recipe, which are fairly lean, so they can dry out quickly. I recommend using an instant-read thermometer to check the thickest part of each chop, especially if yours are thicker than the ones I’ve used. Pork is safely cooked at 145°F, followed by a 3-minute rest. Set the chops aside while you make the gravy, then return them to the skillet briefly to warm through so they don’t overcook. Give the pork chops room to brown. Let the chops sit at room temperature for 10-15 minutes to help take the chill off. Then, pat them dry with paper towels before seasoning and dredging, and make sure the skillet is hot before adding them. If your chops don’t fit comfortably in one layer, cook them in batches! Crowding the pan traps moisture, making it harder to develop that lovely golden crust. Watch the heat, too, as the flour coating can burn if the pan gets too hot. Get the gravy consistency right. The butter and reserved flour form a roux, a mixture of roughly equal parts fat and flour that thickens the gravy. Cook the flour for about a minute to get rid of its raw taste. Then stir in the chicken broth, scraping up those flavorful browned bits from the pan as you go. Let the gravy simmer until it’s thick enough to coat the back of a spoon. Too thick? Add a splash more broth. Too thin? Let it simmer a little longer before returning the pork. Taste before adding more salt. I season my pork with salt, pepper, and paprika, but garlic powder or onion powder are great additions, too! Remember that chicken broths can vary a lot in saltiness. I always taste the gravy after it has thickened before deciding whether it needs more seasoning. Add some extras! I kept my recipe simple with onions and garlic, but sliced mushrooms are a delicious addition, as I use in my creamy pork chops recipe. Cook them with the onions until the excess moisture evaporates. You can even add bacon! Print Add to Collection Go to Collections Smothered Pork Chops This easy Smothered Pork Chops recipe is a Southern favorite! Juicy, golden-seared pork chops in creamy onion gravy, ready in just 35 minutes. Course Main Course Cuisine American Total Cost $5.79 recipe / $1.45 serving Prep Time 15 minutes minutes Cook Time 20 minutes minutes Total Time 35 minutes minutes Servings 4 servings Calories 385kcal Author Melissa Nolan Equipment Plate Large Cast Iron or Large Skillet Tongs Ingredients 1 Tbsp vegetable oil $0.04 4 pork center-cut loin chops boneless, $4.00* ¾ tsp salt divided, $0.03 ½ tsp black pepper freshly cracked, (divided) $0.08 ½ tsp paprika $0.02 ¼ cup all-purpose flour $0.04 1 yellow onion sliced, (2 cups) $0.74 2 Tbsp butter $0.23 2 garlic cloves minced, (1 Tbsp) $0.12 1 cup chicken broth $0.13** ¼ cup heavy cream $0.33*** ¼ tsp dried thyme $0.03 US Customary – Metric Instructions Gather and prepare all ingredients. Heat the oil in a medium cast-iron over medium-high heat. Pat the pork chops dry with paper towels and season evenly with ¼ tsp salt, ¼ tsp pepper, and paprika. Sprinkle the flour on a plate and dredge the pork chops in the flour. Reserve the remaining flour to make the roux. Once the pan is hot, gently place the pork in the cast-iron. Let the pork cook undisturbed for 3-4 minutes on each side until a golden-brown crust forms. Remove the cooked pork from the pan and set them aside on a plate while you make the sauce. Turn the heat to medium, and add the onions, stirring occasionally. Cook until they start to brown, for about 5 minutes. Melt the butter and add the garlic. Cook for 1 minute. Sprinkle in 2 Tbsp of the reserved flour and cook for 1 minute. Add the chicken broth, heavy cream, thyme, and remaining salt and pepper. Cook until it thickens, for about 5 minutes. Return the pork and any juices to the skillet to warm it through. See how we calculate recipe costs here. Notes *I got a great deal at Kroger for $1.00 per pork chop, so it pays to shop around when you can! Take the pork chops out of the refrigerator 10-15 minutes before you’re ready to cook them so they can come closer to room temperature. Pork doesn’t have to reach the internal temperature of 165°F. The safe temperature of pork starts at 145°F. You can use bone-in or a thicker-cut pork, but they’ll take longer to cook. Just make sure the pork reaches a safe internal temperature of 145°F. **I like to use Better Than Bouillon to make my chicken broth to keep costs low. I used 1 tsp of bouillon and 1 cup of water. You can also use vegetable broth or beef broth. It’ll change the sauce’s flavor, but it’ll still be great. ***You technically don’t have to use heavy cream to make the sauce, but it does give it that rich velvety texture and flavor. You could also use whole milk or half-and-half. Just make sure the sauce doesn’t boil, or it might curdle. The sauce might seem thin at first, but just keep stirring and simmering, and it’ll thicken. If the gravy is too thick, just add a splash of chicken broth. If it’s too thin, simmer on low until it thickens. Nutrition Serving: 1serving | Calories: 385kcal | Carbohydrates: 10g | Protein: 31g | Fat: 24g | Sodium: 769mg | Fiber: 1g how to make Smothered Pork Chops step-by-step photos Gather and prepare your ingredients. Let the pork chops sit out at room temperature for 10-15 minutes to take the chill off. Slice 1 large yellow onion (about 2 cups) and mince 2 garlic cloves (about 1 Tbsp). Measure out the remaining ingredients so everything is ready to go. Season the pork chops: Heat 1 Tbsp vegetable oil in a large cast-iron skillet over medium-high heat. Meanwhile, pat 4 boneless center-cut pork chops dry with paper towels. Season both sides evenly with ¼ tsp salt, ¼ tsp black pepper, and ½ tsp paprika. Dredge the pork chops: Spread ¼ cup all-purpose flour on a plate. Lightly coat each pork chop on both sides, shaking off any excess flour. Reserve the remaining flour to help thicken the gravy later. Sear the pork chops: Once the oil is hot, carefully add the chops to the skillet in a single layer. Cook undisturbed for 3-4 minutes per side, until a golden-brown crust develops. Avoid moving them too much so the coating can brown nicely. Check that the thickest part of each chop reaches an internal temperature of 145°F. Transfer the chops to a plate and set aside while you make the gravy. Sauté the onion: Reduce the heat to medium and add the sliced yellow onion to the same skillet. Cook for about 5 minutes, stirring occasionally, until the onion softens and turns golden around the edges. Add the butter and garlic: Stir in 2 Tbsp butter and the minced 2 cloves of garlic. Cook for about 1 minute, stirring frequently, until the butter has melted and the garlic smells fragrant. Be careful not to let the garlic burn, as it can make the gravy taste bitter. Make the roux: Sprinkle 2 Tbsp of the reserved flour over the onion mixture. Stir continuously for about 1 minute, until the flour is fully incorporated. Make the creamy onion gravy: Add 1 cup chicken broth, ¼ cup heavy cream, ¼ tsp dried thyme, and the remaining ½ tsp salt and ¼ tsp black pepper. Stir well, scraping up any browned bits from the bottom of the skillet. Let the gravy simmer for about 5 minutes, stirring occasionally, until it’s smooth and thick enough to coat the back of a spoon. Smother the pork chops! Return the pork chops and any juices collected on the plate to the skillet. Spoon the creamy onion gravy over the top and heat briefly until warmed through. Enjoy! What to Serve with Smothered Pork Chops All this creamy onion gravy deserves something delicious to soak it up! My first choice is a big scoop of mashed potatoes. They’re fluffy, buttery, and perfect for catching every last spoonful of gravy. I’d start the potatoes before cooking the pork chops, since they take about 25 minutes to prepare. For an even cheaper option, serve the chops over white rice. It takes about 25 minutes, too, and can simmer away with the lid on while you work on the pork. Or, for a Southern-inspired dinner, try our cheese grits. They’re cheesy and ready in just 15 minutes, so you can get them going on another burner once you’ve seared the chops. To round out the meal, I recommend some sautéed green beans. Their garlicky flavor and tender-crisp texture are lovely alongside the creamy gravy, and they add some extra veggies to your plate. They only take about 10 minutes to cook once prepped, so you can sauté them in a separate skillet while the onions and gravy come together. That way, everything is ready to serve at roughly the same time. Mashed Potatoes$2.29 recipe / $0.45 serving How to Cook Rice Cheese Grits$3.39 recipe / $0.85 serving Sauteed Green Beans$2.20 recipe / $0.55 serving Storage & Reheating Store leftover smothered pork chops in an airtight container in the fridge for up to 3 days. I recommend keeping the chops covered with plenty of gravy to help prevent them from drying out. Refrigerate within 2 hours of cooking. Reheating I prefer reheating these pork chops in a covered skillet over medium-low heat to help keep them tender. The gravy will thicken as it cools, so add a splash of chicken broth or milk to loosen it up. Heat the gravy thoroughly and warm the pork chops until they reach an internal temperature of 165°F. Try not to heat them any longer than necessary, as boneless pork chops can become tough when reheated. Freezing I wouldn’t freeze these smothered pork chops. The heavy cream in the gravy can separate or turn grainy after thawing, and the pork chops may lose some tenderness. Try These Pork Chop Recipes Next I love making these Glazed Pork Chops when I’m craving something sweet and savory. That sticky brown sugar glaze is SO good! For another easy weeknight dinner, try these Air Fryer Pork Chops. They’re perfectly seasoned, juicy, and require very little cleanup. When apples are in season, make these Apple Spice Pork Chops, which are packed with tender apples, onions, and warm spices. More Creamy Skillet Dinners Creamy Garlic Chicken$9.21 recipe / $2.30 serving Marry Me White Bean Skillet$5.61 recipe / $1.40 serving Tuscan Salmon Skillet$15.24 recipe / $3.04 serving Creamy Chicken And Orzo Skillet$9.45 recipe / $2.36 serving The post Smothered Pork Chops appeared first on Budget Bytes. https://www.budgetbytes.com/smothered-pork-chops/ #porkchops #smotheredpork #gravy #good #even #better #get #gravyeveryone #searmakes #rss #feeds #linksharing #qwibbit

#porkchops #smotheredpork #gravy #good #even
KitchenNotes
KitchenNotes 9d

skillet pierogi with mushrooms Even though we’re having a relatively warm (and delightful) fall, my cravings for carbs-wrapped-in-carbs, caramelized onions, and earthy skillets of vegetables don’t care. Plus, as we’re in the thick of busy times — this year it’s college applications, middle school adjustments, me, working on a new cookbook for you — any time a full meal can be made in one pan and not feel joyless or compromised, it’s going immediately in our dinner rotation. This sure did. Read more » https://smittenkitchen.com/2026/10/skillet-pierogi-with-mushrooms/ #plus #rss #feeds #linksharing #qwibbit

#plus #rss #feeds #linksharing #qwibbit

Welcome to KitchenNotes spacestr profile!

About Me

Good recipes, food photos, and everyday cooking ideas. Unofficial automated fan feed. Content belongs to its respective owners; not affiliated with source publishers.

Interests

  • No interests listed.

Videos

Music

My store is coming soon!

Friends